

 The art and design projects are well sequenced to provide a coherent subject scheme that develops children’s skills and knowledge of visual elements, art forms, artists and art movements.
Projects are placed alongside other subject projects where there are opportunities for making meaningful connections. For example, Beautiful Botanicals has been placed in the same teaching sequence as the science project Plant Nutrition and Reproduction.
Where possible, projects with similar materials are spaced out to have as little strain on resources as possible. For example, in Key Stage 1, clay work is taught in different terms.
Seasons are also a consideration for the placement of art and design projects. For example, if children are required to work outdoors, these projects have been placed in either the latter part of the spring or summer term.
Lower Key Stage 2
In Lower Key Stage 2, each autumn term begins with essential skills and knowledge projects (Colour Theory in Year 3 and Warm and Cool Colours in Year 4). Teaching these projects enables children to build on their previous understanding of colour and further develop their expertise by studying tertiary, analogous and complementary colours with many opportunities for the children to explore warm and cool colours.
In Year 3, children expand their experiences to study a broader range of art forms, artists and genres. They also begin to study art from specific and diverse periods of history, including prehistoric pottery and Roman mosaics. Other genres studied in Year 3 build on previous techniques learned in Key Stage 1 and include more
complex techniques in printmaking, drawing, painting and textiles.
In Year 4, children develop more specialised techniques in drawing, painting, printmaking and sculpture. They explore ways in which ancient cultures have influenced art and crafts by studying, for example, medieval weaving techniques and the religious significance of Islamic art.
Upper Key Stage 2
In Upper Key Stage 2, each autumn term begins with essential skills and knowledge projects (Colour in Landscapes in Year 5 and Colour and Style in Year 6). Teaching these projects enables children to build on their previous understanding of colour theory and develop further expertise with colour by studying tints, shades and tones and more complex colour palettes.
In Year 5, children develop and combine more complex artistic techniques in a range of genres, including drawing, painting, printmaking and sculpture. Children continue to build on their understanding of other historical periods and cultures by studying the ancient Chinese art form of taotie and the significance of the Expressionist movement.
In Year 6, children are encouraged to work more independently in projects like Environmental Artists and Distortion and Abstraction. Such projects require them to consider more conceptual representations of personal, environmental, social or political messaging. Children explore diversity in art by studying the projects Inuit and Trailblazers, Barrier Breakers.
 At Sandhurst Primary, Art and Design is taught through carefully selected topics as outlined below. The choice of topic ensures full coverage of the national curriculum with ample opportunities for pupils to learn about artist from a wide array of geographical and historical backgrounds. We have several highly skilled members of staff who can provide quality teaching of art and design. They provide support across the whole school to ensure teaching of Art and Design is delivered to the very best standard. This expectation is transferred from teacher to pupil as children are taught to take care and to feel proud of their artwork.
EYFS
| EYFS | |||||
Let’s Explore This project teaches children about the environments that they share with others, including their homes, school and places in the local community.
Long Ago This project teaches children about how they have grown and changed since they were babies and how life in the past was different from today. |
Marvellous Machines This interest-led project teaches children about the technology that is part of their daily lives and how machines help us. The project gives children the opportunity to build and create marvellous machines. |
Ready Steady Go This project teaches children about food and farming and explores themes, including where food comes from, what plants and animals need to grow and survive and what constitutes a healthy lifestyle. |
On the Beach This project teaches children about the plants and animals that live at the seaside. It also explores holidays in the past and the importance of keeping safe in the Sun. |
||

Year 1
| Year 1 | |||
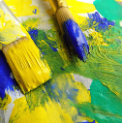
Mixing Colours This project teaches children about basic colour theory by studying the colour wheel and colour mixing. It includes an exploration of primary and secondary colours and how artists use colour in their artwork. |
 Funny Faces and Fabulous Features Funny Faces and Fabulous Features
This project teaches children about the concept of the portrait and how the collage technique can be used to make a portrait. |
 Rain and Sunrays Rain and Sunrays
This project teaches children about collagraph printing, including how to develop a motif to make single and repeated prints. |
 Street View Street View
This project teaches children about artwork depicting streets and buildings and focuses on the work of the American pop artist, James Rizzi. They create a 3-D mural based on Rizzi's work. |
Year 2
| Year 2 | |||
 Exploring Colours Exploring Colours
This project teaches children about colour theory by studying the colour wheel and colour mixing. It includes an exploration of primary and secondary colours, hues and how artists use colour in their artwork. |
 Still Life Still Life
This project teaches children about the work of significant still life artists and still life techniques. They explore a wide variety of still lifes and learn about the use of colour and composition. They create still life arrangements and artwork. |
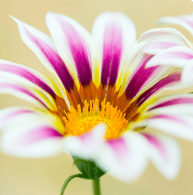 Flower Head Flower Head
This project teaches children about the visual elements of flowers, including shape, texture, colour, pattern and form. They also explore various artistic methods, including drawing, printmaking and 3-D forms, using paper and clay. |
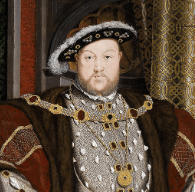 Portraits and Poses Portraits and Poses
This project teaches children about portraiture. They analyse the portraits of Tudor monarchs and compare Tudor portraits and selfies today. They use photo editing software to create royal portraits. |
Year 3
| Year 3 | |||||
 Colour Theory Colour Theory
This project teaches children about colour theory by studying the colour wheel and colour mixing. It includes an exploration of tertiary colours, warm and cool colours, complementary colours, analogous colours and how artists use colour in their artwork. |
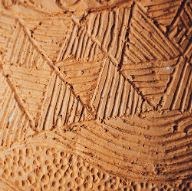 Prehistoric Pots This project teaches children about Bell Beaker pottery. It allows the children to explore different clay techniques, which they use to make and decorate a Bell Beaker-style pot. |
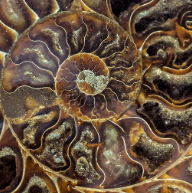 Ammonite This project teaches children about artistic techniques used in sketching, printmaking and sculpture. |
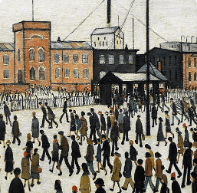 People and Places This project teaches children about the genre of figure drawing. They study the figure drawings and urban landscapes of the artist LS Lowry and create artwork in his style to show scenes from their school. |
 Beautiful Botanicals This project teaches children about the genre of botanical art. They create natural weavings, two-colour prints and beautiful and detailed botanical paintings of fruit. |
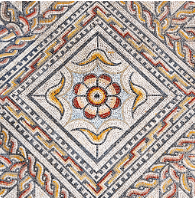 Mosaic Masters This project teaches children about the history of mosaics, before focusing on the colours, patterns and themes found in Roman mosaic. The children learn techniques to help them design and make a mosaic border tile. |
Year 4
| Year 4 | |||||
 Warm and Cool Colours Warm and Cool Colours
This project teaches children about colour theory by studying the colour wheel and colour mixing. It includes an exploration of warm and cool colours, Aboriginal art and how artists use colour in their artwork. |
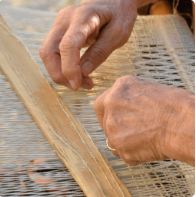 Warp and Weft Warp and Weft
This project teaches children about the artform of weaving and how it has developed over time, including the materials and techniques required to create woven patterns and products. |
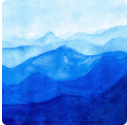
 Vista Vista
This project teaches children about the techniques that artists use when composing landscape images, such as colour and atmosphere. |
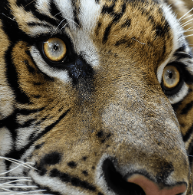 Animal Animal
This project teaches children about the historical and cultural portrayal of animals in art. They study the visual qualities of animals through sketching, printmaking and clay modelling. |
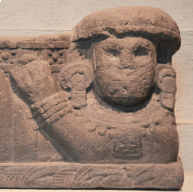 Statues, Statuettes and Figurines Statues, Statuettes and Figurines
This project teaches children about the 3-D representation of the human form, including statues, statuettes and figurines. They study examples from ancient civilisations, and use their clay skills to create a Sumer-style figurine. |
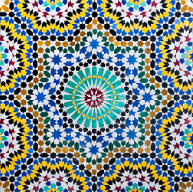 Islamic Art Islamic Art
This project teaches children about the features of Islamic art. They make geometric patterns and motifs on paper, with fabric and in clay. They use their learning to create a high relief clay tile, decorated with geometric patterns. |
Year 5
| Year 5 | |||||
 Colour in Landscapes Colour in Landscapes
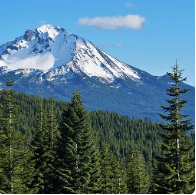
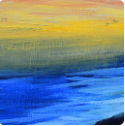
This project teaches children about colour theory by studying the colour wheel and exploring mixing tints, shades and tones. They learn about significant landscape artworks and features of landscapes before using this knowledge to create landscape paintings. |
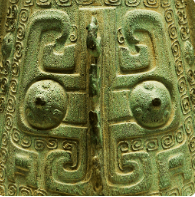 Taotie Taotie
This project teaches children about the significance and art of the taotie motif, including ancient and contemporary casting methods. |
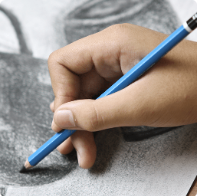 Line, Light and Shadows Line, Light and Shadows
This project teaches children about the visual qualities of line, light and shadow. They explore the work of Pablo Picasso and Rembrandt and are introduced to a range of shading techniques. They take black and white photographs and use pencil, pen and ink wash to reimagine their photographs in a shaded drawing. |
 Natures Art Natures Art
This project teaches children about the genre of land art. They work outdoors to sketch natural forms and explore the sculptural potential of natural materials before working collaboratively to create land art installations. |
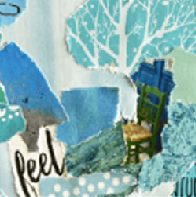 Mixed Media Mixed Media
This project teaches children about paper crafts, papermaking and collage techniques, including paper, fabric, mixed media and photo collage. They use their learning to create a final piece of small-scale, mixed media collage. |
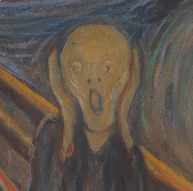 Expression Expression
This project teaches children about the Expressionist art movement and the 'Father of Expressionism', Edvard Munch. They explore different ways to portray feelings and emotions in art to create an imaginative self-portrait. |
Year 6
| Year 6 | |||||
 Colour and Style Colour and Style
This project revisits learning about colour theory, including primary, secondary, tertiary, complementary, analogous, warm and cool colours, hues, tints, shades and tones. They learn about the use of colour in four art movements before using this knowledge to create a painting with personal meaning. |
 Trailblazers, Barrier Breakers Trailblazers, Barrier Breakers
This project teaches children about significant black artists and their work, and provides opportunities to analyse and create artwork inspired by them. |
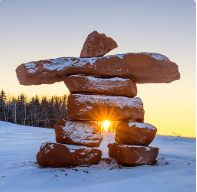 Inuit Inuit
This project teaches children about the Inuit way of life, including some of their cultural and artistic traditions. |
 Environmental Artists Environmental Artists
This project teaches children about the genre of environmental art. They study how artists create artwork that addresses social and political issues related to the natural and urban environment. Children work collaboratively to create artwork with an environmental message. |
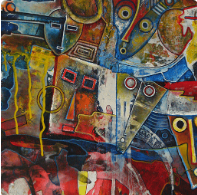
 Distortion and Abstraction Distortion and Abstraction
This project teaches children about the concepts of abstraction and distortion. They study the visual characteristics of abstraction and create a musically-inspired, abstract painting. |
 Bees, Beetles and Butterflies Bees, Beetles and Butterflies
This project teaches children about sketchbooks, observational drawing, mixed media collage and Pop Art. They consolidate their learning to make a final piece of artwork inspired by bees, beetles or butterflies. |
 Our curriculum pedagogy is based on four distinct stages (known as the Four Cornerstones) which aim to give clear direction – through a carefully sequenced, interconnected and knowledge-rich planning sequence – for both teaching and learning:
Engage – Develop – Innovate - Express
- Engage in memorable experiences that stimulate children’s curiosity, leading them to ask questions and talk about their prior learning.
- Develop new skills and knowledge by delving deeply into a theme, where children make links, create, explore, make, read and write.
- Innovate by returning to prior knowledge and skills so that children can use and apply these in new contexts (in and out of school).
- Express what has been learned by providing opportunities for children to reflect, test their knowledge and celebrate their achievements.
Following our Cornerstones Curriculum, we use quality-assured lesson resources, knowledge organisers, practical resources and vocabulary to further support children’s developing artistic subject knowledge. The resources contain the essential knowledge and skills that children need for each art and design topic.
Throughout their time spent at Sandhurst Primary School, children will build year on year, their art knowledge and skills. Through a carefully structured curriculum, children will have opportunities to learn new skills and revisit previously taught ones. Teachers will make judgement upon children’s understanding through sketch book recordings, teacher observations, final pieces and classroom dialogue are used to assess the children’s understanding. Our weekly art and design lessons provide children with a relaxing, creative outlet to express their ideas whilst learning to enhance their skillset.
Possible Career Aspirations for the Future
We want our pupils to develop a love for art and as a result remind them, if they continue to aim high they could become a Professional Artist, Illustrator, Photographer, Graphic designer, Animator or choose from many other exciting professions!

Cornerstones Curriculum
We provide a creative curriculum based around the Cornerstones Curriculum, a nationally recognised approach for delivering outstanding learning opportunities for children.
What is the Cornerstones Curriculum?
The Cornerstones Curriculum is a creative and thematic approach to learning that is mapped to the Primary National Curriculum to ensure comprehensive coverage of national expectations. Our new curriculum will be delivered through Imaginative Learning Projects (ILPs) which will provide a rich menu of exciting and motivating learning activities that make creative links between all aspects of our children’s learning.
We believe children learn better when they are encouraged to use their imagination and apply their learning to engaging contexts. Our new curriculum will provide lots of learning challenges throughout the academic year that will require children to solve problems, apply themselves creatively and express their knowledge and understanding effectively across the curriculum.
Cornerstones also provide a rigorous essential skills framework that outlines the end of year expectations in all subjects. These essential skills are tied to activities and are age related so that staff can track children’s progress and identify their individual learning needs.
How it Works?
Children will progress through four stages of learning in each ILP – Engage, Develop, Innovate and Express. To find out more about these stages please click on the link through to Cornerstones website:
https://cornerstoneseducation.co.uk/why-cornerstones/
Please find downloadable PDF versions of the Information available for the Art Curriculum.
Creativity
| Reception | Year 1 | Year 2 | Year 3 | Year 4 | Year 5 | Year 6 |
| Big Idea : Creativity | ||||||
| Aspect : Creation | ||||||
| Different types of art include painting, drawing, collage, textiles, sculpture and printing. Create art in different ways on a theme, to express their ideas and feelings. | Ideas can be created through observation (looking closely), imagination (creating pictures in the mind) and memory (remembering experiences from the past). Design and make art to express ideas. | Materials and techniques that are well suited to different tasks include ink; smooth paper and polystyrene blocks for printing; hard and black pencils and cartridge paper for drawing lines and shading; poster paints, large brushes and thicker paper for large, vibrant paintings and clay, clay tools and slip for sculpting. Select the best materials and techniques to develop an idea. | Visual elements include colour, line, shape, form, pattern and tone. Use and combine a range of visual elements in artwork. | Materials, techniques and visual elements, such as line, tone, shape, pattern, colour and form, can be combined to create a range of effects. Develop techniques through experimentation to create different types of art. | Preliminary sketches and models are usually simple line drawings or trial pieces of sculpture that are created to explore ideas and techniques and plan what a final piece of art will look like. Produce creative work on a theme, developing ideas through a range of preliminary sketches or models. | In conceptual art, the idea or concept behind a piece of art is more important than the look of the final piece. Create innovative art that has personal, historic or conceptual meaning. |
| Aspect: Generation of ideas | ||||||
| Communicate their ideas as they are creating artwork. | Discussion and initial sketches can be used to communicate ideas and are part of the artistic process. Communicate their ideas simply before creating artwork. | A sketch is a quickly-produced or unfinished drawing, which helps artists develop their ideas. Make simple sketches to explore and develop ideas. | Preliminary sketches are quick drawings that can be used to inspire a final piece of artwork. They are often line drawings that are done in pencil. Use preliminary sketches in a sketchbook to communicate an idea or experiment with a technique. | Artists use sketching to develop an idea over time. Create a series of sketches over time to develop ideas on a theme or mastery of a technique. | Ways to review and revisit ideas include annotating sketches and sketchbook pages, practising and refining techniques and making models or prototypes of the finished piece. Review and revisit ideas and sketches to improve and develop ideas. | A mood board is an arrangement of images, materials, text and pictures that can show ideas or concepts. A montage is a set of separate images that are related to each other and placed together to create a single image. Gather, record and develop information from a range of sources to create a mood board or montage to inform their thinking about a piece of art. |
| Aspect: Evaluation | ||||||
| Share their creations with others, explaining their intentions and the techniques and tools they used. | Aspects of artwork that can be discussed include subject matter, use of colour and shape, the techniques used and the feelings the artwork creates. Say what they like about their own or others’ work using simple artistic vocabulary. | Aspects of artwork to analyse and evaluate include subject matter, colour, shape, form and texture. Analyse and evaluate their own and others' work using artistic vocabulary. | Suggestions for improving or adapting artwork could include aspects of the subject matter, structure and composition; the execution of specific techniques or the uses of colour, line, texture, tone, shadow and shading. Make suggestions for ways to adapt and improve a piece of artwork. | Constructive feedback highlights strengths and weaknesses and provides information and instructions aimed at improving one or two aspects of the artwork, which will improve the overall piece. Give constructive feedback to others about ways to improve a piece of artwork. | Ideas are the new thoughts and messages that artists have put into their work. Methods and approaches are the techniques used to create art. Compare and comment on the ideas, methods and approaches in their own and others’ work. | Strategies used to provide constructive feedback and reflection in art include using positive statements relating to how the learning intentions have been achieved; asking questions about intent, concepts and techniques used and providing points for improvement relating to the learning intention. Adapt and refine artwork in light of constructive feedback and reflection. |
Materials
| Reception | Year 1 | Year 2 | Year 3 | Year 4 | Year 5 | Year 6 |
| Big Idea : Materials | ||||||
| Aspect : Malleable materials | ||||||
| Materials can be soft and easy to shape, like dough, or harder and more difficult to shape, like wire. Manipulate malleable materials into a variety of shapes and forms using their hands and other simple tools. | Malleable materials include rigid and soft materials, such as clay, plasticine and salt dough. Manipulate malleable materials by squeezing, pinching, pulling, pressing, rolling, modelling, flattening, poking, squashing and smoothing. | Malleable materials, such as clay, plasticine or salt dough, are easy to shape. Interesting materials that can make textures, patterns and imprints include tree bark, leaves, nuts and bolts and bubble wrap. Press objects into a malleable material to make textures, patterns and imprints. | Malleable materials, such as clay, papier-mâché and Modroc, are easy to change into a new shape. Rigid materials, such as cardboard, wood or plastic, are more difficult to change into a new shape and may need to be cut and joined together using a variety of techniques. Create a 3-D form using malleable or rigid materials, or a combination of materials. | Techniques used to create a 3-D form from clay include coiling, pinching, slab construction and sculpting. Carving, slip and scoring can be used to attach extra pieces of clay. Mark making can be used to add detail to 3-D forms. Use clay to create a detailed or experimental 3-D form. | Relief sculpture projects from a flat surface, such as stone. High relief sculpture clearly projects out of the surface and can resemble a freestanding sculpture. Low relief, or bas-relief sculptures do not project far out of the surface and are visibly attached to the background. Create a relief form using a range of tools, techniques and materials. | A 3-D form is a sculpture made by carving, modelling, casting or constructing. Create a 3-D form using malleable materials in the style of a significant artist, architect or designer. |
| Aspect : Paper and fabric | ||||||
| Papers and fabrics can be used to create art, including tearing, cutting and sticking. Cut, tear, fold and stick a range of papers and fabrics. | Collage is an art technique where different materials are layered and stuck down to create artwork. Use textural materials, including paper and fabric, to create a simple collage. | Art papers have different weights and textures. For example, watercolour paper is heavy and has a rough surface, drawing paper is of a medium weight and has a fairly smooth surface and handmade paper usually has a rough, uneven surface with visible fibres. Different media, such as pastels, or watercolour paint, can be added to papers to reveal texture and the rubbing technique, frottage, can be used to create a range of effects on different papers. Create a range of textures using the properties of different types of paper. | Warp and weft are terms for the two basic components used in loom weaving. The lengthwise warp yarns are fixed onto a frame or loom, while the weft yarns are woven horizontally over and under the warp yarns. Weave natural or man-made materials on cardboard looms, making woven pictures or patterns. | Stitches include running stitch, cross stitch and blanket stitch. Use a range of stitches to add detail and texture to fabric or mixed-media collages. | Traditional crafting techniques using paper include, casting, decoupage, collage, marbling, origami and paper making. Make and use paper to explore traditional crafting techniques. | Materials have different qualities, such as rough or smooth, hard or soft, heavy or light, opaque or transparent and fragile or robust. These different qualities can be used to add texture to a piece of artwork. Combine the qualities of different materials including paper, fabric and print techniques to create textural effects. |
| Aspect : Paint | ||||||
| The primary colours are red, yellow and blue. Use primary and other coloured paint and a range of methods of application. | The primary colours are red, yellow and blue. Identify and use paints in the primary colours. | The secondary colours are green, purple and orange. These colours can be made by mixing primary colours together. Identify and mix secondary colours. | Examples of contrasting colours include red and green, blue and orange, and yellow and purple (violet). They are obviously different to one another and are opposite each other on the colour wheel. Identify, mix and use contrasting coloured paints. | Warm colours include orange, yellow and red. They remind the viewer of heat, fire and sunlight. They can make people feel happy and they look like they are in the foreground of a picture. Cool colours include blue, green and magenta. Cool colours remind the viewer of water, ice, snow and the sky. They can make people feel calm or lonely and they recede into the background of a picture. Identify, mix and use warm and cool paint colours to evoke warmth or coolness in a painting. | A tint is a colour mixed with white, which increases lightness, and a shade is a colour mixed with black, which increases darkness. Mix and use tints and shades of colours using a range of different materials, including paint. | Different artistic movements often use colour in a distinctive way. Expressionist artists use intense, non-naturalistic colours. Impressionist artists use complementary colours. Fauvist artists use flat areas or patches of colour. Naturalist artists use realistic colours. Use colour palettes and characteristics of an artistic movement or artist in artwork. |
| Aspect : Printing | ||||||
| Make simple prints using a variety of tools, including print blocks and rollers. | A print is a shape or image that has been made by transferring paint, fabric paint, ink or other media from one surface to another. Make simple prints and patterns using a range of liquids including ink and paint. | A block print is made when a pattern is carved or engraved onto a surface, such as clay or polystyrene, covered with ink, and then pressed onto paper or fabric to transfer the ink. The block can be repeatedly used, creating a repeating pattern. Use the properties of various materials, such as clay or polystyrene, to develop a block print. | A two-colour print can be made in different ways, such as by inking a roller with two different colours before transferring it onto a block, creating a full print then masking areas of the printing block before printing again with a different colour or creating a full print then cutting away areas of the printing block before printing again. Make a two-colour print. | Different printmaking techniques include monoprinting, engraving, etching, screen printing and lithography. Combine a variety of printmaking techniques and materials to create a print on a theme. | Some artists use text or printed images to add interest or meaning to a photograph. Add text or printed materials to a photographic background. | Printmakers create artwork by transferring paint, ink or other art materials from one surface to another. Use the work of a significant printmaker to influence artwork. |
| Aspect : Pencil, ink, charcoal and pen | ||||||
| Different types of line include thick, thin, straight, zigzag, curvy and dotty. Select appropriate tools and media to draw with. | Soft pencils create darker lines and are marked with a B for black. Hard pencils create lighter lines and are marked with an H for hard. Different types of line include zigzag, wavy, curved, thick and thin. Use soft and hard pencils to create different types of line and shape. | Textures include rough, smooth, ridged and bumpy. Tone is the lightness or darkness of a colour. Pencils can create lines of different thicknesses and tones and can also be smudged. Ink can be used with a pen or brush to make lines and marks of varying thicknesses, and can be mixed with water and brushed on paper as a wash. Charcoal can be used to create lines of different thicknesses and tones, and can be rubbed onto paper and smudged. Use the properties of pencil, ink and charcoal to create different patterns, textures and lines, and explore shape, form and space. | Hatching, cross-hatching and shading are techniques artists use to add texture and form. Add tone to a drawing by using linear and cross-hatching, scumbling and stippling. | Pen and ink create dark lines that strongly contrast with white paper. Pen and ink techniques include hatching (drawing straight lines in the same direction to fill in an area), cross-hatching (layering lines of hatching in different directions), random lines (drawing lines of a variety of shapes and lengths) and stippling (using small dots). Light tones are created when lines or dots are drawn further apart and dark tones are created when lines or dots are drawn closer together. Use the properties of pen, ink and charcoal to create a range of effects in drawing. | Ink wash is a mixture of India ink and water, which is applied to paper using a brush. Adding different amounts of water changes the shade of the marks made. Ink wash can be used to create a tonal perspective, light and shade. Use pen and ink (ink wash) to add perspective, light and shade to a composition or model. | Line is the most basic element of drawing and can be used to create outlines, contour lines to make images three-dimensional and for shading in the form of cross-hatching. Tone is the relative lightness and darkness of a colour. Different types of perspective include one-point perspective (one vanishing point on the horizon line), two-point perspective (two vanishing points on the horizon line) and three-point perspective (two vanishing points on the horizon line and one below the ground, which is usually used for images of tall buildings seen from above). Use line, tone or shape to draw observational detail or perspective. |
Nature
| Reception | Year 1 | Year 2 | Year 3 | Year 4 | Year 5 | Year 6 |
| Big Idea : Nature | ||||||
| Aspect : Natural art | ||||||
| Logs, pebbles, sand, mud, clay and other natural materials can be used to make simple 2-D and 3-D forms. Use natural materials and loose parts to make 2-D and 3-D art. | Transient art is moveable, non-permanent and usually made of a variety of objects and materials. Natural materials, such as grass, pebbles, sand, leaves, pine cones, seeds and flowers, can be used to make transient art. Make transient art and pattern work using a range or combination of man-made and natural materials. | Natural forms are objects found in nature and include flowers, pine cones, feathers, stones, insects, birds and crystals. Draw, paint and sculpt natural forms from observation, imagination and memory. | Nature and natural forms can be used as a starting point for creating artwork. Use nature and natural forms as a starting point for artwork. | Natural patterns from weather, water or animals skins are often used as a subject matter. Represent the detailed patterns found in natural phenomena, such as water, weather or animal skins. | Various techniques can help children to take clear, interesting photographs, such as using auto mode, pausing and focusing before taking a picture, using the rule of thirds (imagining the view is split into three equal, horizontal sections and positioning key elements in the thirds), avoiding taking pictures pointing towards a light source and experimenting with close-ups, unusual angles and a range of subjects. Record and edit natural forms, animals and landscapes with clarity, using digital photography and graphics software. | Environmental art addresses social and political issues relating to natural and urban environments. Create art inspired by or giving an environmental message. |
Place and Space
| Reception | Year 1 | Year 2 | Year 3 | Year 4 | Year 5 | Year 6 |
| Big Idea : Place and Space | ||||||
| Aspect : Landscapes | ||||||
| A painting of a place is called a landscape. Draw or paint a place from observation or imagination. | Drawings or paintings of locations can be inspired by observation (looking closely), imagination (creating pictures in the mind) and memory (remembering places from the past). Draw or paint a place from memory, imagination or observation. | A landscape is a piece of artwork that shows a scenic view. Draw or paint features of landscape from memory, imagination or observation, with some attention to detail. | An urban landscape is a piece of artwork that shows a view of a town or city. Draw, collage, paint or photograph an urban landscape. | Art can display interesting or unusual perspectives and viewpoints. Choose an interesting or unusual perspective or viewpoint for a landscape. | Imaginative and fantasy landscapes are artworks that usually have traditional features of landscapes, such as plants, physical and human features, but they have been created from the artist's imagination and do not exist in the real world. Use a range of materials to create imaginative and fantasy landscapes. | Perspective is the art of representing 3-D objects on a 2-D surface. Draw or paint detailed landscapes that include perspective. |
Comparison
| Reception | Year 1 | Year 2 | Year 3 | Year 4 | Year 5 | Year 6 |
| Big Idea : Comparison | ||||||
| Aspect : Compare and contrast | ||||||
| Discuss similarities and differences in their own and others' work, linked to visual elements, such as colour, scale, subject matter, composition and type. | Similarities and differences between two pieces of art include the materials used, the subject matter and the use of colour, shape and line. Identify similarities and differences between two or more pieces of art. | Common themes in art include landscapes, portraiture, animals, streets and buildings, gardens, the sea, myths, legends, stories and historical events. Describe similarities and differences between artwork on a common theme. | Explorations of the similarities and differences between pieces of art, structures and products from the same genre could focus on the subject matter, the techniques and materials used or the ideas and concepts that have been explored or developed. Compare artists, architects and designers and identify significant characteristics of the same style of artwork, structures and products through time. | Artwork has been used at different times and in different cultures to express ideas about storytelling, religion and intellectual satisfaction. Similarities and differences between artwork can include the subject matter, style and use of colour, texture, line and tone. Compare and contrast artwork from different times and cultures. | Visual elements include line, light, shape, colour, pattern, tone, space and form. Describe and discuss how different artists and cultures have used a range of visual elements in their work. | Perspective is the representation of 3-D objects on a 2-D surface. Abstraction refers to art that doesn't depict the world realistically. Figurative art is modern art that shows a strong connection to the real world, especially people. Conceptual art is art where the idea or concept behind the piece is more important than the look of the final piece. Compare and contrast artists’ use of perspective, abstraction, figurative and conceptual art. |
Significance
| Reception | Year 1 | Year 2 | Year 3 | Year 4 | Year 5 | Year 6 |
| Big Idea : Significance | ||||||
| Aspect : Significant people, artwork and movements | ||||||
| Explore artwork by famous artists and talk about their likes and dislikes. | Words relating to colour, shape, materials and subject matter can be used to explore works by significant artists. Describe and explore the work of a significant artist. | Works of art are important for many reasons: they were created by famous or highly skilled artists; they influenced the artwork of others; they clearly show the features of a style or movement of art; the subject matter is interesting or important; they show the thoughts and ideas of the artist or the artist created a large body of work over a long period of time. Explain why a painting, piece of artwork, body of work or artist is important. | The work of significant artists, architects, cultures and designers has distinctive features, including the subject matter that inspires them, the movement to which they belong and the techniques and materials they have used. Work in the style of a significant artist, architect, culture or designer. | Historical works of art are significant because they give the viewer clues about the past through the symbolism, colours and materials used. Explain the significance of art, architecture or design from history and create work inspired by it. | Artistic movements include Expressionism, Realism, Pop Art, Renaissance and Abstract. Investigate and develop artwork using the characteristics of an artistic movement. | Works of art can be significant for many reasons. For example, they are created by key artists of an artistic movement; have influenced other artists; have a new or unique concept or technique or have a famous or important subject. Explain the significance of different artworks from a range of times and cultures and use elements of these to create their own artworks. |
| Our agreed consistencies for art: | If you were to walk into an Art lesson at Sandhurst you would see: | In our Art curriculum you will see that we value inclusion and diversity: |
|
|
|